You may not think about your pedals all that much, but eventually you’re going to want to change them — or have to. Pedals get old, they get dirty, parts wear out, and newer and better ones hit the market. Unluckily for you, replacing pedals can be annoying and confusing if you’ve never done it before. Luckily for you, we’re here to explain every step of the process.
Figure out which wrench you need
Pedals will be screwed on and off with one of two types of wrench: a pedal wrench (basically a standard open-ended wrench with a thinner head) or a hex wrench (also known as an Allen wrench). If your pedal requires a pedal wrench, it’ll almost certainly be a 9/16″ or 15mm size. These two measurements are so close that often one wrench will work on both sizes, but it’s best to make sure. If your pedal requires a hex wrench, it’ll most likely be an 8mm size, though some manufacturers are starting to use 6mm as well. Lots of multi-tools will have both sizes on them, so you shouldn’t have much trouble finding the one that fits.
What you’re looking for is either a flat area on either side of the spindle itself or a hexagon-shaped hole in the end of the spindle. If your pedal has flat sides on the spindle, you need a pedal wrench. If it has the hexagonal hole, you need a hex wrench. Some pedals have both!
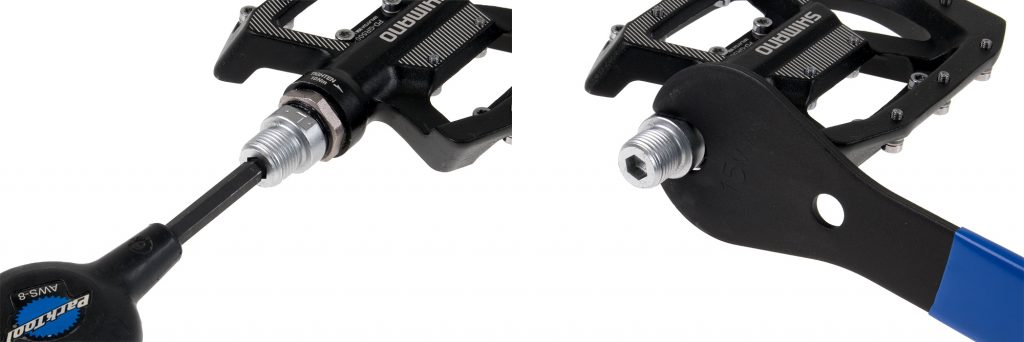
This pedal is compatible with both a 6mm hex wrench (left) and a 15mm pedal wrench (right).
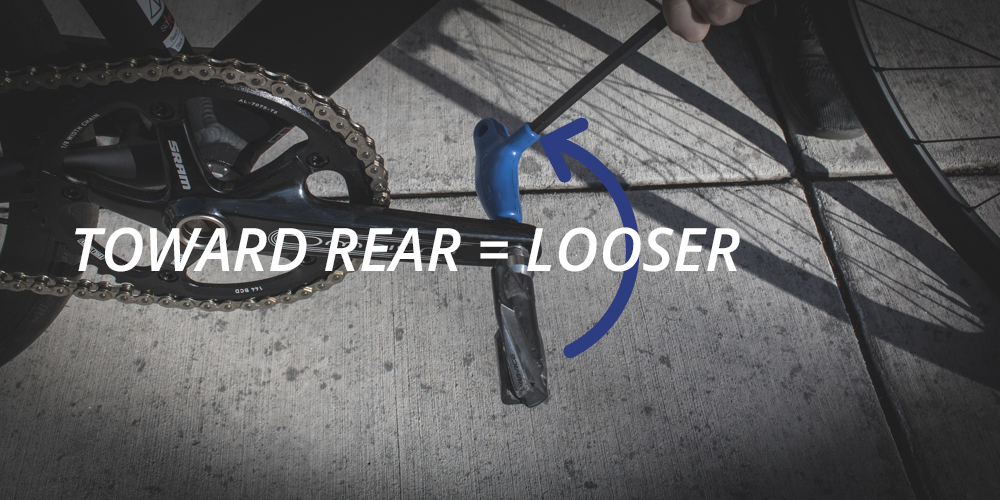
Threading
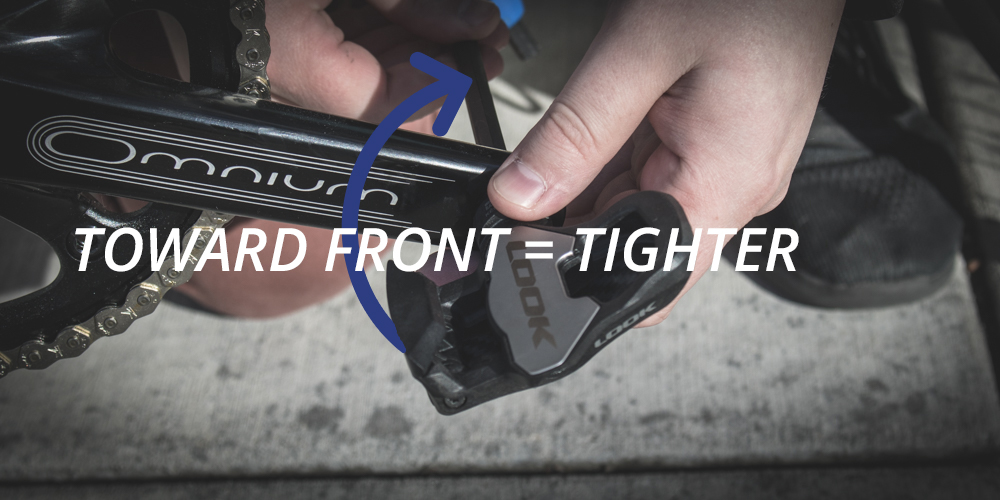
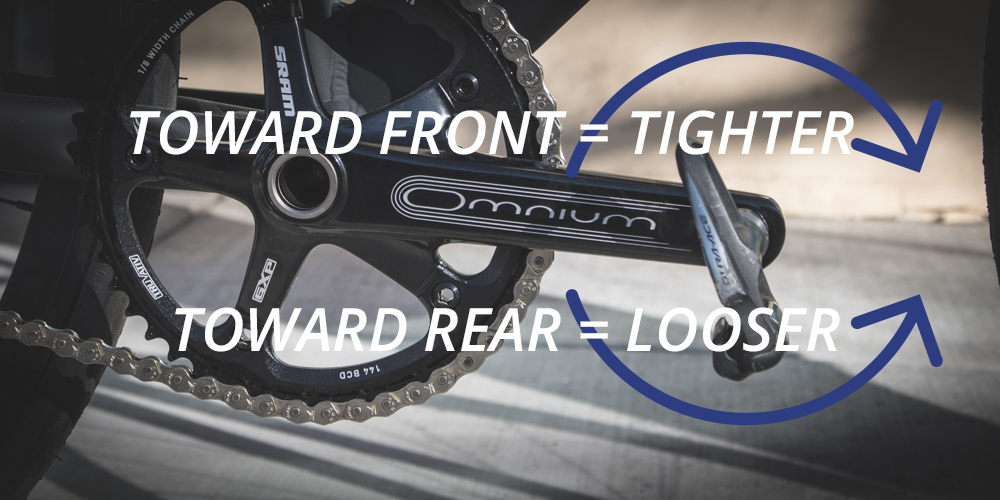
Threading is where people get tripped up — even people who have done this a million times. The old adage “righty-tighty, lefty-loosey” that you learned as a kid doesn’t necessarily apply here, since one of the pedals is reverse-threaded. Rather than trying to remember which one is which, just think of it this way: if you’re rotating the pedal toward the front of the bike, it’s getting tighter. If you’re rotating it away from the front of the bike, it’s getting looser. The reason for this is that your pedals actually tighten themselves as you ride, so they’ll never come unscrewed. In addition, if your pedals have some sort of catastrophic failure in the bearings and seize up (highly unlikely but you never know), they’ll unscrew rather than hurting your ankle or causing a crash.
 Getting the old ones off
First thing to remember: don’t use a power tool for this. It may be tempting to use a drill or electric driver, but if you turn them the wrong way, steel or titanium spindles can chew up an aluminum crank pretty badly. Your old pedals might be pretty sticky, too, depending on how long they’ve been in there, so be patient. Set the bike on the ground so the wheels don’t turn, seat the wrench so that it’s horizontal and pointing toward the front of the bike, and then pull upward to loosen the spindle. It might help to hold the other pedal between your shins to keep the crank from spinning.
 Putting the new ones on
Just reverse the process! Rotate the pedals toward the front of the bike to get the threads seated. You can start the threads by hand, then finish with the wrench. Again, don’t use power tools. The beauty of the reverse threading on pedals is that they tighten themselves as you ride, and they also need to be able to unscrew if they seize. So just hand-tighten your new pedals and you’re good to go!